Monday, December 31, 2012

Hello 2013!


Okay so you know how people use the expression "as excited as a kid at Christmas" well that is my feeling today.  Here we are on the brink of a new year and honestly I can't wait to get started.  2012 was not good to me in a lot of ways but I wouldn't trade all of those bad minutes for a second because I got some really great memories, opportunities, and experiences in there too.  No need to hash out all of the details here but I am excited as a fat kid with cake to start 2013 with a brand new set of goals and a shinny new calendar.

Monday, October 22, 2012

Summer Love (Part 1)

The group over at the Old Red Barn Quilt Along has taken a break from quilt alongs and issued a quilt challenge throw down.  You can find the details here and it isn't too late to join in on the fun.  I really wanted to participate but I'm not sure I will have enough time to finish up my quilt top before the deadline of the 31st so I am working on this project with that deadline in mind but am not fully committed.


So step one was to choose a color pallet for inspiration.  Of course I still had tons of those pinned from when I was considering joining the Dead Simple Quilt Along a while back.  I poured over color pallet sites for days but in the end I kept coming back to the same one and decided to just go for it.  I had talked with an online friend about this same pallet around the time of the Dead Simple Quilt Along and had mentioned how much it reminded me of Fresh Cuts.  Of course being the fan I am of that line I still had some prints sitting in my sewing room.  I ordered a healthy does of Bella Solids to go with the Fresh cut pieces and then I was ready to get to work.


 This pallet reminds me of Summer and for some reason I just kept thinking about summer love.  You know that easy kind they talk about in every country love song ever written.  And that made my think about carnivals and Ferris wheels.  Yeah I know it's not a very new concept but once it was in my mind I just couldn't shake it and decided to just let it be the inspiration it so clearly wanted to be.  I searched and searched for a block that gave the feeling of a Ferris wheel without being a literal interpretation.  I couldn't really find anything that I loved but in the end decided to use a block by Elizabeth.  I think it loosely resembles a turning bucket shape.  And so my summer love quilt has begun.

Sunday, October 14, 2012

Find My Fabric


Sometimes I am asked to review services that would benefit my audience.  And while I have never participate before because I am only willing to share products I would use myself.  I did decided to share this site with you.  Although the following is my opinion of Find My Fabric, I do need to disclose that I am being compensated for this review.


Have you heard about findmyfabric.com?  It's a pretty cool search engine just for fabric lovers.  I had the chance to spend some time on the site and wanted to share with you all the pros and cons I found.  I hope you will take the chance to look around on the site and that you will bookmark it for help in finding products you may be looking for in the future.

I really like the easiness of the search feature.  If you know the name of the fabric you are trying to find you can just type it right in the search box and it will search 100's of stores and return a list for you.  One of the best parts is that it displays the prices so no more clicking on links to compare who has the best price.

The one drawback to the search I found that it wouldn't be fair if I didn't tell you about is that the site only searches for the product in stores that are registered with the site.  These means some of those more obscure fabric sites may still be missed.  If you have friends or family that have online stores be sure to tell them about the site so they can check into registering.  The more stores that participate the better this site will serve all of us in the sewing community.

Another cool feature the site offers is the ability to search using something similar to facial recognition technology.  Say you have a piece of fabric and you don't have the selvage and you can't remember the name of it but you are having one of those OMG I am short of this fabric and I have to get more pronto moments.  Come on I know I'm not the only person that happens to.  You can snap a picture and upload it to the site.  The computer then runs that photo through the system and returns similar images.

I tried it and while it did find the fabric I was looking for it also gave me some other interesting products as well.  I searched for a gray polka dot and was a little surprised when rulers popped up on my screen.  So the technology may not be perfect but over all it was a success.  And ultimately I think I would rather it give me more options than be so specific it might risk not returning my desired fabric.  The rulers it showed me did after all have gray dots on them.

The site is still in a bit of a test phase right now but I know I will be bookmarking it and using it to find what I am looking for in the future.  Having all of the pricing alone in one spot is sure to save me some time and energy.  So go have a look around on the site and be sure to let me know what you think.

Tuesday, September 4, 2012

Dueling Flurry


You may remember from way back in December when I made "The List" one of the project I listed was my dueling flurry quilt.  My mom and I made matching Christmas quilts a few years ago and then my mom surprised me by giving me her quilt for Christmas that year.  We decided that my brother and sister in law needed to have Christmas quilts as well and if we each made one it would make the process that much easier.  We decided on Flurry by Kate Spain for the fabric and my mom picked out the Seville pattern Cluck Cluck Sew.  This quilt is made up of three different block types-all of which are relatively easy.  I had the first two sets of blocks done a while back because our original goal was to drop the quilts off to the long arm quilter by the end of July.  Then I procrastinated.  I am not a huge fan of snowball blocks.  I haven't found a trick that works for me and any block that requires sewing a square to a rectangle or a larger square and then cutting it off and pressing back to fill in that space does not get along well with me.  No matter how careful I am when I cut, press, and sew they always seem to go a little wonky on me.  But my mom dropped her top off last week so I knew I needed to get on the ball and get this one done so I took advantage of the three day weekend here in the states to make that happen.  But it must have been a little later than I thought on Sunday night when I laid out my quilt top and started sewing rows together because it is not as evenly distributed as I would have normally done.

First four rows sewn together.  Bottom four rows of the quilt.
I decided the next morning when I got up that I would make it work instead of ripping the seams.  And by happy accident I ended up putting a red square in each of the four corners.  You probably don't remember but the Christmas Quilt my mom gave to me is named Red Square Envy and this is one of the traits of that quilt.  So it seems appropriate that my brothers quilt also has a little red square envy of its own.


Finished Quilt Top

This is the finished quilt top after I got the boarders sewn on and I very much like it now that it is done.  I am particularly fond of the large circles the pattern makes.  I think it is just the right amount of interesting and with it being in Christmas fabrics I think they look a little like ornaments and the squares look like gifts.  Maybe that is a stretch but that's what I see when I look at it.  My mom is going to drop this one off at the long arm next week so she can work a little more Flurry magic into it.  Turns out the snowflake design my mom selected to have them quilted in is also called Flurry.  It may be a while before I have finished photos to show you but at least I can pretty much promise you this one will get finished in 2012.

Friday, August 17, 2012

Traveling Quilts Roundup

Over the past eight months I was lucky enough to participate in a spin off group that came from the Old Red Barn Quilt Along group.  A lot of the really good friends I have made in this online community are from that group.  I don't think Dana had any idea how big it would become or how many amazing friendships would be formed through the group when she first started that original quilt along but there have been many a quilt made through that group and many a friendship as well.


For the last round I had Dee's quilt.  Now I was lucky enough to get to meet Dee in person a few years back so I knew I wanted to do something really special for her quilt.  I pondered and pondered and in the end I decided a tribute of sorts to the very first Old Red Barn Quilt would be a nice touch.  So I added a modified rail fence boarder.  Dee's only request was that we pick one color for her starting square to use as the focus.  There were lots of great colors in there but I decided to focus on the plums and mustard's.  It seemed to me like they would help ground the quilt after all of the white space Nichole used in her round.  I have to say I am so in love with the color scheme that I plan to sew my quilt for 100 Quilts for Kids from the same pretty colors.  I think it is girly with a side of sophistication and hope that maybe a little older girl will appreciate it.


Here is a look back at the other quilts I had the chance to work on.

Finally my quilt top is finished and will hopefully be on the way home soon.  I started off with the smallest center of just a 12 inch block but my top has grown into a massive queen size quilt.  My only request was a orange, blue, and gray color story.  Dee had my quilt first and started off by adding those amazing spools.  They popped up several times and it's so exciting to see how well they all work together and the cohesiveness they bring to the top as a whole.  I already have a plan for the back and then this one will be going to the long arm to be quilted.  Hopefully I'll have it finished by the end of 2012 and it won't get sucked into the WIP vortex.  


Tuesday, August 14, 2012

Argh Matey

Ahoy there!  Just a quick little baby quilt to share with you today.  One of my coworkers had a baby a few months ago and this quilt has actually been sitting around for a while just waiting to have the binding finished.  So I finished sewing it down last night and have a quick spin in the washer and a tumble in the dryer it was baby ready.  I fussy cut some pieces from a focal fabric and then just arranged it in a pretty abstract way.  I was going for controlled improv.  Sorry for the less than stellar photos I realized after I got to work that I hadn't taken any.

Improv is not my strong suite.


She really threw me off a bit with the Pirate theme and because I was trying to finish it in time for a baby shower I just went with fabrics I could find here locally.  In the end I didn't finish in time for the shower and could have held out for something else but I think these colors work with the other pieces she already has in the nursery and hopefully will be a bright and cheerful addition to baby Tripp's collection.

Closer view of the front and the quilting.

For the quilting I kept it simple and just did some wavy lines on my home machine.  I kept the quilting to a minimum since I wanted the quilt to stay nice and snugly soft but I'm almost regretting not throwing a few more lines in after seeing how much it crinkled in the wash.  It finishes at about 38 by 46.

Showing off the fun fabrics on the back.

I have a bit of fabric left from this quilt.  Scraps really but there is a good part of the focal fabric I used on the front left that you could probably get quite a few fussy cut pieces out of.  I'm going to give it away to a good home so if you are interested just leave me a comment and let me know.  It will just be first come first serve.

Sunday, August 5, 2012

Crazy Town

So I feel like I have been living in crazy town lately.  I haven't been spending much time sewing so I haven't had a lot of things to share here as of late.  I've been reading more and more post from friends saying they haven't felt much like sewing lately and that they are taking a break.  I totally understand that sentiment.  I did get a chance to catch up on my traveling quilts this weekend.


 First I had this masterpiece.  My original plan was to applique flowers into the corners.  But those ribbons and leaves closer to the middle are paper pieced.  No way could I add raw edge applique to this thing.  I struggled a lot to find something I liked.  Finally settling on a border from quilters cache called entwined.  WOW did I way underestimate how much time this would take.  I can't even begin to think what it would have been like if I had gone all the way around with the intricate piecing.  In the end I opted not to because the measurements were off a bit and I couldn't get my limited math skills to cooperate with me.  So I made the background and the rail that the ribbon was entwined around go all the way around and placed the ribbon in opposite corners.


I did a ton of seam ripping on this bad boy.  I made many of the pieces upside down not once or twice but too many to count.  It seems silly now but I kept looking at the piece I had done and not thinking that I needed to make the mirror image of it for the other side.


Next up I worked on this quilt which is super scrappy.  It is HUGE already and measures close to queen size.  So I went with a very simple scrappy border.  I got a lot of great fabrics mixed in there.  Sorry I didn't get a better photo but it is already boxed up and off to its last stop in the traveling quilt group.  I have one more quilt left to work on and then this group will be complete.  I am planning on taking a break from flickr after this.  Life has just gotten a little crazy and I hate feeling like I am letting people down because they are waiting for me.  And seeing all of the new groups and quilt alongs can be a little maddening sometimes because it turns into inspiration overload.  So I think a break will be good for me so I can get on the train out of crazy town.

Wednesday, June 20, 2012

WIP Wednesday

I've been out of town at a convention for work so I don't have a lot to show you this week but I miss blogging on a regular basis and you know what they say, no better time then the present.  Since I was out of town and spending a lot of time in a convention center and hotel I took along my hexagons for a little hand sewing.  I forgot how much time this project takes.

Hexagon Quilt Progress
I found that I have the best luck with sewing little chunks and then adding them to my middle so that's why this thing isn't even but I think it is coming along okay.  With any luck it will be done by 2016.

I think this one is called Honey's Choice but I'm not sure.

This is the last Farmer's Wife Quilt Along block I made before choosing to pack this one up for a while.  I've been finding these little blocks to be pretty challenging lately and because of that I've lost a little love for this project.  I am determined to finish it and I think if I give myself a little time off when I pick it up again I'll be ready to give it everything I've got and finish it up.  Really I packed it up because if it's out in my sewing room I will like I HAVE to work on it and it takes the joy out of something fun sometimes.  So it's just taking a little nap.

Blocks for Dueling Flurry

 I've been cutting pieces for my half of the dueling flurry quilts.  It looks like I am making my brothers quilt while my mom is working on the matching one for my sister in law.  These are going to be Christmas gifts but our goal is to have the tops pieced by the end of July so that the long arm quilter has plenty of time to work on them.  I guess I better get busy.  We are using Alison's Seville pattern.  If you haven't check out her patterns yet I recommend them for sure.  This is the second pattern I have used of hers and they are just so easy to read and follow.  This quilt looks really complicated finished but its really just the repeat of 3 different types of blocks.  While cutting I needed a little bit of a break and I couldn't help but sew up a few of these super easy blocks.

1st Row of Scrappy Stars

Finally before getting busy with Summer Sorbet I did manage to sew one row of my scrappy stars quilt together.  It's very skinny so I am going to have to make a few more blocks in order to get the size I want but that's okay.  It is going to be a great quilt when it's done.

Be sure to head over to Lee's and see what everyone else is working on.  Lee's taking the summer off from WIP Wednesday but she has lined up some great talent to guest post on her blog during her break.

Thursday, June 7, 2012

Summer Sorbet

I finished up the summer sorbet quilt this morning around 12:30am and it is being delivered tonight along with meals to my boss.  She wasn't feeling up to a visit so I just sent it along.  I know she will love and appreciate it and I hope she finds strength in its warmth.  You can read more about the quilt and it's story here.


Summer Sorbet Quilt

Summer Sorbet Front

It is quilted in an all over circle pattern.  I think they look more like tennis balls because of the way the circles loop back into themselves before transitioning on to the next.  But I was hoping it would not only tie in with the circles on the minky back but that it would also soften all of the sharp angles in the blocks on the front.

Close up of the quilting.


Front and Back of Summer Sorbet

 I used couture cotton in raspberry for the binding.  This new solid is super silky and it was really easy to hand sew as binding.  I can see more of this solid in my future for sure.  I love the way it frames out the quilt, balances with the bright colors in both the front and back, and ties it all together.


Friday, June 1, 2012

Summer Sorbet Strength

You may remember that I was working on finishing up a quilt based on the Bizzy Kid pattern from Alison at Cluck Cluck Sew.  Originally I didn't have any specific plans for this quilt.  I was just so inspired by the color scheme and a need to sew that I knew I wanted to make something even though I had no idea what.  After getting this quilt started I realized its bright and happy colors would be perfect for a quilt I was needing to make for a coworker.  Recently my boss was diagnosed with Cancer and my first thought was she needs a quilt.  She's going to be going through radiation and I wanted her to have something to cuddle under to take lots of naps.

Sorbet From Pintrest

I had planned to order washi tape fabric for the back of this quilt but once I had a plan my goal became to finish it as quickly as possible and get it to my boss.  My mom suggested that I look at using Minky for the back because it would add that extra special bit of softness.  I got online and started looking for minky and it didn't take me long to find something I liked from fabric.com.  I knew my quilt top was going to measure somewhere close to 60 by 80 when I finished so I sent some emails back and forth with my mom and decided to order 2 1/2 yards of a minky that was 60 inches wide.

Kaufman Minky Cuddle Balloon Party Aqua/Magenta


Yes, EPIC FAIL!  60 inches wide of course is selvage to selvage which you all know won't work.  I had the backing fabric sent to my mom's because I thought this would make the process faster.  I dropped the finished quilt top off to my mom last Saturday so that she could take it to the quilter who had promised that once we dropped it off she would finish what was on her long arm and then load this quilt next.  That's one great thing about having a relationship with a long arm quilter, they help you out when it's important.  It was only when my mom and dad laid the backing and quilt top out together that the mistake was realized.  Then the text message came.  Your quilt top is 2 inches bigger than your backing.  WOW!  How am I going to fix this?  I knew my mom had already been gracious enough to sew muslin to the minky to give the long arm quilter a way to stretch it into the frame.  So I suggested we cut 1/2 inch off both sides and then I would just use an extra wide binding to cover the little bit of muslin that would be left in the quilt.

The next text I got was "I am not cutting your quilt top!"  I quickly shot back oh it's fine.  I really need to get this done and I don't have time to come back and get it and then take it all apart.  You see my boss is currently in week 4 of a 7 week cycle and I really want to get this finished and to her.  I explained again to my mom that even though I understand the importance of not doing anything at all if you aren't going to do your best that in this case it was more important to me to have it finished than to have it perfect.  But finally I agreed to think about it overnight.

The next day my mom suggested that if I took out the 4 long seams and resewed them 1/4th of an inch smaller it would pull in the quilt top enough to make it work.  This was followed by a lot of grumbling from me that I didn't have time to make the trip back down to their house after work followed by me agreeing to do it.  My father stayed up until 11 taking out all four of the long seams.  The next day I was schedule to come down and resew those seams but this little thing call work and a crazy rainstorm got in the way.  Not that it would have mattered because by lunch time my mother had texted me a finished photo of the resewn quilt top.  By the way my parents if you don't know them are some of the nicest, kindest, most considerate people you will ever meet!  They aren't just this sweet to me.

Top after being sewn back together.

I have to say I think the finished top looks even better now then it did when I had finished it.  The quilt is at the long arm now and she is hoping to have it finished by the end of the weekend.  I am dropping dinner off for my boss on Thursday so I am hoping to have the binding and all done by then so I can take the quilt to her.  Hopefully she will find strength in summer sorbet and will know that she is loved.

Wednesday, May 16, 2012

WIP Wednesday (The One With The Rescue)

So it's been a long time since I've been able to spend some quality time with my machine.  But now that Bertha and I are back to being BFF's, it's been nice to be able to resurrect some old projects and work on some new ones at the same time.

Block # 75 Rosebud

Over the last few weeks I've managed to make 1 (yes only one) Farmer's Wife Blocks.  It is block #75, Rosebud.  Now that I have a little more time to spend with Bertha I am really looking forward to working on some of the harder blocks I have left.  I have enough blocks done that I could stop here and just make a lap size quilt but learning new things is one of the main reasons I wanted to do this quilt along.  So I am sticking with it in hopes of finishing another super girly queen sized quilt for the guest bedroom.

Finished Loulouthi Tiles on a Queen Bed
My big finish this week was my Loulouthi Tiles Quilt.  You can read all about that here.  But I wanted to give you a quick second look and this time I took a photo on the bed so you could see how well it covers.  It does go to the end of the mattress on the left side but the right side against the wall could have used one more column in my opinion then it would be just right. 

Column 1 & 2 of Bizzy Kid

Bizzy Kid was my new start in the last two weeks.  I love how easy this pattern came together and if you haven't already used one of Allison's patterns I would recommend them for sure.  I am still working on a better name for this, maybe summer sorbet.  But I don't really know.  You can read more about the inspiration for this quilt here.
 
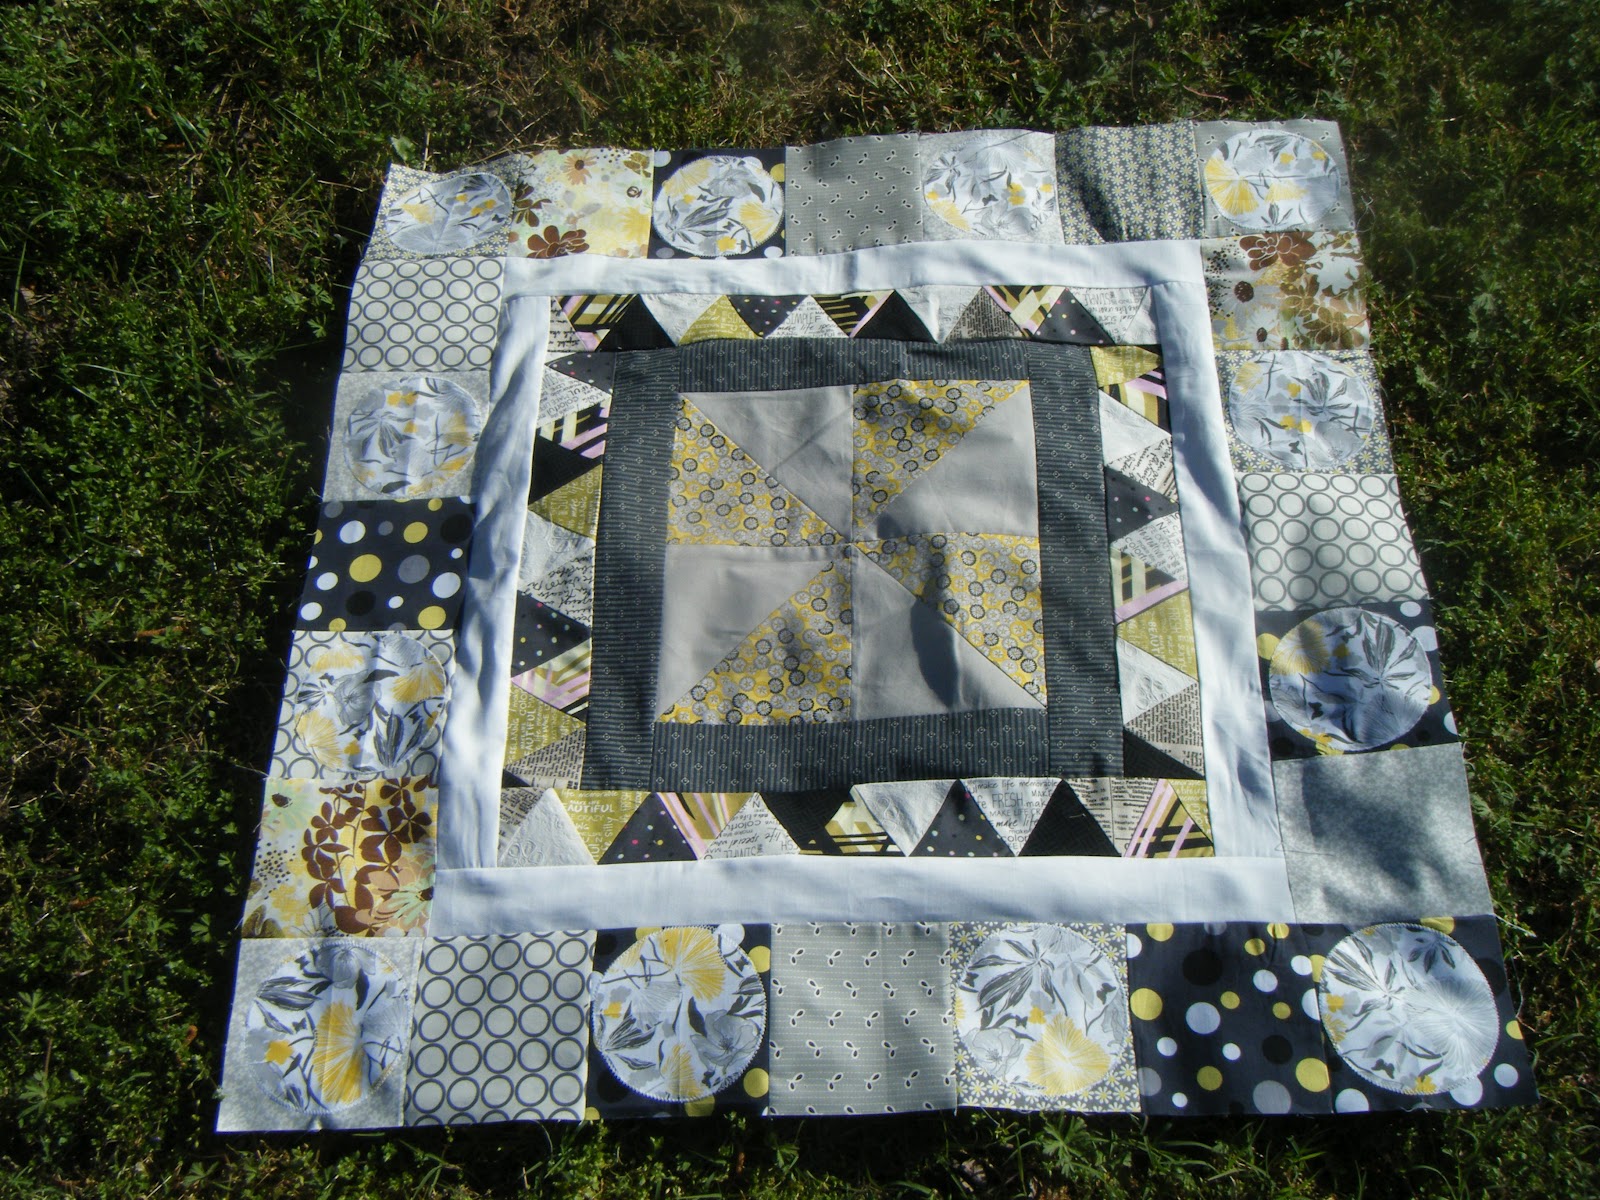
Needs at least 1 more block
New this week I am bringing back a quilt that has set as blocks for a very long time in my sewing space.  Do you remember this post way back in 2010?  Well that was the year of the bees for me and the first and only bee I have hosted to date Bee-Stitched was among those.  I remember spending way too much time fretting over what kind of block to use and finally landing on one inspired by Red Pepper Quilts.  Shortly after I requested this block I saw it popping up like crazy in blogland but I haven't really ever seen a finished quilt made from the pieces.  In fact I believe even Rita's is still a WIP.  This week I decided to get it out and see how many blocks I had and what I wanted to do with it.  I had originally planed to add stars to the sashing like in Rita's original layout but I think I really just like the overall scrappy goodness and the additional stars made from sewing the blocks together as they are.  I have to make at least one more block for this quilt top to have enough and I am contemplating actually making 4-5 more so that I can add another row or column.  I like my quilts to be big so that they are easy to snuggle under.  I'm not sure about this one just yet but I think it is destine to be a gift for a lovely friend that is moving the end of July.  It's strange because when I picked this block and these fabrics (yes that is original FMF in there-that I paid an arm and a leg for) I wanted it to be so perfect because I knew I would never give it up.  I didn't have much of a stash then and I bought a lot of fat quarters just to cut up into this treasure.  I begged people to be sure and use the FMF and those fussy cut goldfish in their blocks because I paid so much money for them when they were hard to find.  If only I had known by the time I got around to finishing the quilt those fabrics would be available as reprint.  But now because it is so scrappy good and I love it so much I think those are the best kinds of gifts.  The ones you want to keep for yourself but give away because you care for the person that much.

Blocks pressed and laid out
Be sure to head on over to Lee's to see what every one else is up too.  And be sure to link up your own WIP cause I know I need more inspiration.

Tuesday, May 15, 2012

Traveling Quilts

This year I am only participating in one group activity over on Flickr.  A group from the Old Red Barn Quilt Along Fame broke off into small groups to make traveling quilts.  I of course had to join in.  I knew this year was going to be busy and crazy and annoyingly painful but I learn a lot from my friends in blogland and I couldn't imagine not having any group interaction.  So while I thought I was being smart just joining in one group it turns out I am still running behind but thankfully they still tolerate and put up with me.

Christine's Quilt Top

When I first got Christine's quilt top I was determined to get started right away and get this one out on time.  So I started working on a friendship braid.  Well when that turned out to be an epic fail I was at a loss as to where to go next.  I didn't know what I wanted to do and I was out of ideas.  I think sometimes that is the hardest part about bees and groups like this.  We put so much pressure on ourselves to make something AMAZING that sometimes we miss out on the need for something simple.  I was feeling the time crunch and I knew I had to have these two tops in the mail on Monday because I had promised.

Close up of the stacked logs.

I had been so inspired by this quilt, in fact it was the reason I joined this group.  So I did a little digging and found that the quilt was actually based on a quilt along.  So I spent some time really looking at the quilt along and the different layers.  In the end I decided to do the stacked logs.  I had lots of strips already cut for the friendship braid that hadn't worked and I didn't want to waste them so I added to that and made a border of stacked logs.  I used pinks, purples, and yellows to go along with the colors of the flowers in the original center of this quilt and then threw in some greens as well.  Mostly because I don't have any purple in my stash and the pieces you see are ones I bought specifically for this quilt from a local quilt store along with some my mom brought me last time I was searching for purple.  It really is hard to find good purples so if anyone know of any I would love it if you would share the names so I can add to my collection.  This quilt is rather large already as it is now measuring 60" by 60" and it still has a few rounds to go.  I did send along some yellow pieces in case Dee wants to put another solid border between our two rounds.

Pam's Quilt Top.  Amazing!

Next up was Pam's quilt top.  I really love the way this top is coming together but I was also extremely intimidated by it.  Well after looking at it one thing I really liked was the organic feeling the top had.  The middle is a little wonky but not in a sharp angled way but more of a gentle curve.  The fabrics in the middle also move from green to blue.  I'm sure these are probably pieces of batiks but it really smacked me across the face.  The other thing I noticed right away was that Pam had mentioned she wanted this to be a wall hanging and well again it's so large already I knew I wanted my round to be small.  I had this idea to do a pinstripe.  Of course my stubborn self immediately ruled that out as it was too simple of a concept.  But after that nothing I tried seemed right and in the end I knew the pinstripe in all of its simplistic nature was the right way to go.  So I added a pinstripe of color that transitions from lime green into orange and then into aqua.  And a black border that is actually a tone on tone print.  There are various stripes in the black fabric as well.  Over all I love what this simple addition does for this quilt top.

Close up of my pinstripe

Here is a shot of what my quilt top looked like the last time I saw an update on it.  I only asked for a aqua, orange, and gray color scheme.  I think it is progressing beautifully.

The last updated photo of my quilt top.  I can't wait for this one to come home!

PS-Sorry for the bad indoor photos but it was late when I finished these and like I said I had to pack them up to get them in the mail.

Sunday, May 13, 2012

Loulouthi Tiles

I finally managed my second finish of 2012.  I can't believe it is already May and I am this far behind on my goal of making 12 quilts in 2012 but maybe the summer will be productive.  After all summer is typically when blogland comes alive with numerous quilt alongs.  I started this quilt after my parents were nice enough to purchase a kit for my birthday last October.

Loulouthi Tiles
I first mentioned this quilt in "The List" and it made it's first appearance in WIP Wednesday all the way back in January.  I have to admit that there were several times throughout making this quilt that I really just wanted to pack it away and save it for later.  My dad is the one who convinced me that we really could work out the math and make this one happen.  I followed Rachel's original concept but changed the quilt a little.  I added both of my rows to the quilt into the length and didn't widen it.  My finished quilt measures about 97 inches long by 87 inches wide.  I do wish I had added a little more width since I fully intend to use this quilt on my bed.  But I think overall it will be fine.

Front of Loulouthi Tiles Quilt
This is the first quilt I have made so large and I opted not to hand quilt around the large tiles as I knew I would never get around to it.  Instead, I sent this one to the long arm that my mom and I both use.  She does a great job with all of our quilts and I love working with her.  After having some less than stellar experiences with different long arms in the local area it is well worth the hour drive to have Ellen quilt these up for me.  And lets face it, usually I just drop my quilts off with my mom and make her do the hard work of picking out a quilt pattern.  This quilt is the first one I sent to Ellen where I actually spent a lot of time looking through her books and picking a design.  I narrowed it down to this pattern and another called Orange Peel.  I was kind of set against a flower since I want to use this one on my bed and didn't want it to be overly girly (yes, you can feel free to laugh at me because I realize now that the butterflies and huge flowers amp up the girly factor A LOT).  In the end Ellen suggested this one as it matched a bit of the pattern in the fabric I chose for the backing.  Of course once she pointed that out to me I couldn't go with anything else.


Close up of the quilting
It's quilted in two different shades of gray.  With the thread on the top being a shade or two lighter than that on the back.  I really wanted the quilting on the back to sort of fade into the quilt rather than stand out.  I used didn't have enough fabric left to make binding and I really didn't know what I wanted that would look as great on the front as it would on the back.  In the end I used a solid PB Gray that I think frames out the front nicely and blends into the fabric on the back.  The back is mostly this gray and orange print with one little strip down the middle of miniature tiles which replicate the feeling of the front.
 
Back of Loulouthi Tiles Quilt

Overall, I think it looks great and I am pretty happy to have a new quilt to snuggle under when I go to bed tonight.  It's in the wash now getting it crinkle on.

Monday, May 7, 2012

Bizzy Kid

If you have been reading a long for a while you know that my life has been a little crazy as of late.  One of our friends was going through a rough spot and we opened our home to him and his two year old daughter.  It made it difficult to sew and I have gotten pretty far behind on a lot of my projects.  Is that possible?  Can you be behind on something that is just a hobby?  With the exception of my one commitment to a Round Robin group I have not joined any bees or swaps this year in anticipation that it might get a little crazy.  So can I really be behind?  I mean I doubt I will make my goal of 12 quilts this year since it is May and I have only one finish for the year thus far but that is just a personal goal so there really isn't any consequence to not meeting that goal but it feels strangely like pressure.  This weekend I was finally able to spend a little time in my sewing room just relaxing, listening to Pandora, and sewing away.  So what do you do when you have about 4 projects you are in the middle of, round robin quilts that need to be done, and about a million other things all calling for your attention-start something new of course.  At least that's what I did!  I was originally inspired by this fabric pull that Corey did for a pillow swap and knew I wanted to make something with these bright colors.  So I started pulling fabrics for a granny squares quilt since that is the latest quilt along that the Old Red Barn Quilt Along group is working on.  But then I saw this quilt top and knew that they would be too similar.  And well honestly I wasn't feeling the granny square love.  Sometimes I like to do quilt alongs but sometimes I can't help but think I don't want a quilt like everyone else.

The two different sets 

So I had seen a pattern over at Cluck Cluck Sew the other day that I liked.  I don't buy many patterns because usually I can look at the picture and sort of figure it out but in this case I just wanted someone else to have done all the math for me.  Bizzy Kid wasn't the original pattern I saw but it stuck my fancy when I was ordering.  I needed to spend time sewing and not looking at inspiration only to find the day gone and a project not started.  So on Thursday night I ordered the PDF (another first for me) pattern of Bizzy Kid and read through the instructions.  I looked at my fabrics I had pulled and figured out I had what I needed.  I went to the LQS on Friday during my lunch break to get some Kona Snow and was hoping to find some charcoal sketch.  They appeared to be out of both but lucky for me a willing salesperson and a trip to the back found a bolt of Kona Snow that was not in the inventory in the computer.  So Friday night I cut my solid six inch squares and made the larger hourglass blocks.  Sunday I spent most of the day sewing and was able to complete the blocks and sew the sets together.  The only thing left is to sew the columns together and wait till payday to order some washi tape fabric for the back.  I think it will be the perfect fabric for this quilt.

This is a queen bed with blocks laid out on it.  The row hanging off the side will actually move to the other side of the quilt there just wasn't enough room.  And this should finish at about a twin size according to the pattern.
This is the first pattern I have purchased from Allison but I would recommend her again.  I found the pattern to be very well written and easy to understand.  And while the pattern was simple enough and I probably could have figured it out myself it was nice to have the math already taken care of for me.  Another handy trick I learned while putting this one together, my Tucker Trimmer (HST ruler) was perfect for trimming my hourglass blocks.  The two diagonals on the ruler made it the perfect tool.

I also got my Loulouthi Tiles quilt back from the long arm so I should have my second finish of the year to share with you soon.  Hopefully that will take some of the pressure off.  What have you been sewing?

Tuesday, April 10, 2012

Farmer's Wife Quilt Along Week???


I haven't abandoned my Farmer's Wife Quilt Along project but I do seem to be having a harder time finding little moments to sew these 6 inch blocks.  At the start it was all fun and games and they were addictive but I am afraid I have done most of the "easier" blocks and left myself with some pretty tough blocks to work on.  I do have a few easier blocks left that I am holding out on for the right moment but since I don't paper piece and I am using the templates and a lot of starch just cutting out these pieces seems to take a long time.  There is all that tracing and then cutting but it is so worth it.  I can't wait to see this beauty finished and I am already thinking about the next one.  I don't really have a plan for this finished quilt although with it being queen sized it would fit my bed nicely if I can convenience the hubs it isn't too girly with all those flowers.  With all that being said I have three blocks to show you this week.  I've lost track of what week we are suppose to be on and I know I am behind again but maybe when things calm down a bit around here and I get back to a normal schedule I will be able to catch back up.

Block # 63 Ozark Maple Leaf


Block # 88 Star of Hope


Block # 104 Wild Geese

The Star of Hope block gave me a little trouble as I used the templates and a quarter inch seam but the HST pieces were still longer then the large square at the bottom.  So after I squared it up the corners look a little funny but I think once it is sewn in it will look right again.  It's just odd sometimes when the templates don't come out quiet right and I have checked and rechecked the sizing so I know I am doing it correctly as most of the blocks are correct.  It's just every once in a while when one goes a little hinky.

Monday, April 9, 2012

Round Robin

Okay seriously I don't know how you guys with kids do it.  We have a 2 year old staying with us temporarily and it is taking a serious toll on my sewing time.  Maybe it's because she isn't mine and I don't feel like I can discipline her the way I would my own child but I find it's easier to just not sew with her in the house.  So I am really behind on my hobby.  It is after all just a hobby and the only real commitment I have to hold to is my round robin group.  Admittedly I have been slow in completing these and getting them on to Dee but lucky for me she is quick and doesn't grumble at me too much for being slow.  Although I am determined to do better when things get back to normal.


For this round Susan had asked for a yellow and gray color scheme but had left the design elements completely up to use.  Nichol added in a few colors with the introduction of her fabrics in the triangles.  So I went back to mostly gray and yellows so that the color scheme would stay strong but I did keep one fabric that tied in the other colors Nichol used.  I wanted something that would offer nice juxtaposition to the sharp angles of the triangles.  A friend recommended I use circles.  And with that I was off.


I used a CD to cut out the circles which worked pretty well overall.  There were a few places where my circles weren't perfect as I was cutting multiple layers at one time.  Overall I thought it worked well though.  One thing I would recommend when doing applique by machine, remember to change to your zig zag stitched.  Okay so I'll admit I sewed down four circles for my smaller sides and then walked away from my machine.  When I came back and was walking back through getting my machine set and I changed my stitch I suddenly realized, duh that's why that wasn't working like I thought it would.  I had forgotten to change it from a straight stitch to a zig zag.

I'm already working on my round for April and should have some progress to show you a little later this week along with a Farmer's Wife Update.

Saturday, March 17, 2012

Down On The Farm

There isn't much sewing going on around here lately.  It seems my inability to focus has caused me to spend tons of time in the sewing room moving stuff around and looking at fabric, pretty pictures, and patterns but no actual sewing.  I'm a few blocks behind on my Farmer's Wife Quilt Along Quilt again already but I did manage to sew up a few of them in the last week or so.

Noon & Light Block # 60

Peace & Plenty Block # 64

I'm not a huge fan of Square Dance.  I wanted to use the stripe fabric because I have been having a really hard time working that in to these little squares but I'm not sure it has enough contrast to really make that block pop the way it needs to since it is such a simple block.


Square Dance Block # 85


Tulip Block # 96


How are you coming along on the Farm?  These blocks bring my total count to 63 out of 111 blocks done.  I am finding it is a little harder to find blocks I want to make when I just have a few minutes to sew since I have made a lot of the easier blocks.  But it is still a fun project and I am excited to see what happens when it's done.